Last updated 12/24/05
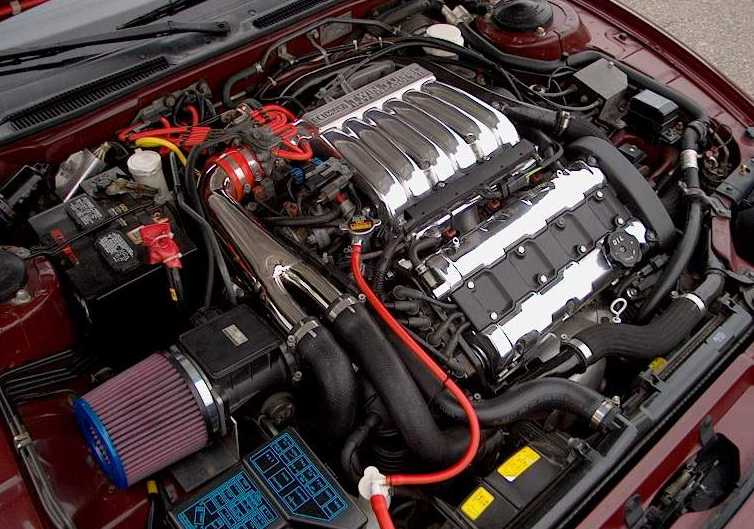
Complete list of parts and prices Complete list of parts and prices. I spent over $5000, see were the money went!
Parts Comparison pictures have moved here:
Parts that I modifed Pictures have moved to here:
Go to Greg McIntyre's page to swap complete engine and not just shortblock!
This picture below shows what happens to your valves when the timing belt slips 3 teeth or more.
After being ground by a machine shop this one was bent enough that only half of the valve got ground.
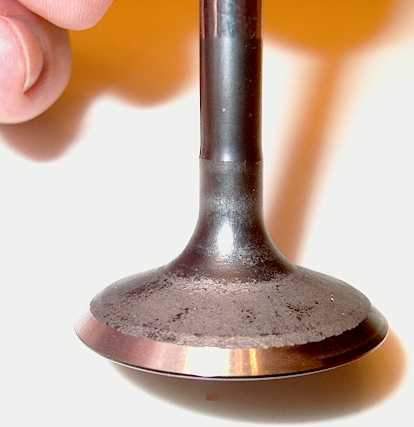
The picture above shows the shiny marks on the pistons were the valves hit.
Does your car have a 4-bolt main?
If you own a 91 or 92 model you probably have a 2-bolt main.
If you own a 93 or newer model you probably have a 4-bolt main.
In June of 92 Mitsubishi made a production change to switch to a 4-bolt main block.
The most significant change to the block is it now had 4-bolt main bearing caps (instead of 2) and that the
crank was nitride coated steel (ipo cast iron).
The best way to find the date your car was built is to enter your vin number into CAPS program.
If you don't have access to CAPS post on 3si and I bet someone will look it up. If not look for sticker
on car door jamb but this is not always accurate. According to a Team3S post: Jim Berry's Door jamb said
May 92(2-bolt main) but CAPS said June95 (4-bolt main) an inspection of his car showed it had 4-bolt main.
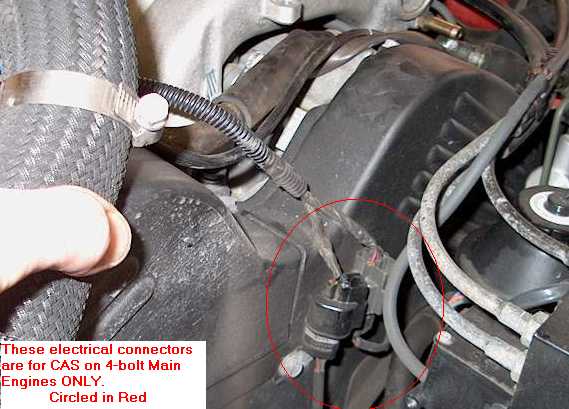
Another good way id to look for the CAS on the Rear head on the passenger side.
Below is a picture of the CAS on a 2-bolt main.

Below is a picture of the wiring for the CAS on a 4-bolt main:
Why should you do a 4-bolt main conversion
on your 3000gt VR-4 or Stealth TT?
You should only do this for the following reasons:
1. You found a great deal on a 4-bolt main short block
2. You are a fanatic that wants to take absolutely no chances
Why should you NOT do this conversion:
It is not really needed for block strength, Altered Atmosphere, Dynamic Racing and GT-Pro all have suggested
that if the steel crank is dropped in the 2-bolt main block it will be strong enough to support more horsepower
than most people will be able to make w/o incredible amounts of modifications.
The money you save by reusing your 2-bolt main block could be used to buy forged pistons instead!
Why I did this conversion:
I decided to do a 4-bolt main conversion because M&S recycling was auctioning short blocks for $1500.
This was at least a $800 savings over a new short block from the dealer. This was a very popular conversion
at the time and I did not realize I could put a steel crank in my 2-bolt block. I bought all of the needed
parts for the conversion, I thought... and then tried to buy a short block. M& S was now asking the same price
as a dealer because the block were so popular! After searching frantically for another deal I bought a new
short block from Brad Bedel? who had a spare block because he assumed that he would blow his first block.
After a year he needed the cash an sold me the block. Yellow Freight was kind enough to damage the block in
shipping so I had to buy a short block from the dealer.
Parts Needed for this conversion:
There are 4 types of parts needed for this conversion.
1. Parts that must be replaced.
2. Parts that must be modified
3. Parts that should probably be replaced because you will never get access to again unless you tear the engine apart.
4. Things to consider just because you can.
1. Required items
(be sure to verify part numbers with your dealer)
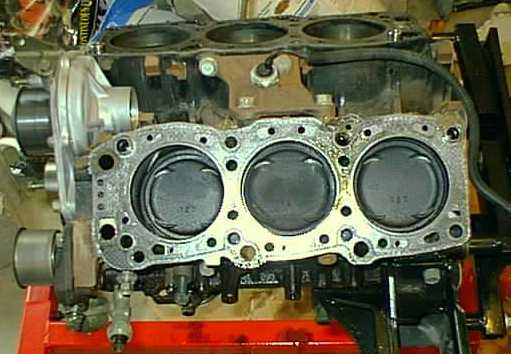
- 1993+ block (block with crank, rods, pistons, rings, bearings, caps)
[bare block with main caps, bolts, and plugs = MD187502;
short block assembly with crank, pistons, rods, bearings = MD326222 or MD314123 $2300
- Gasket kit, engine overhaul (includes head gaskets, etc. also) (MD997670) ~$285
- Oil pump, front crank seal and case (CAPS identifies as "Case Assy, Cylinder Block, Fr") (MD190982) ~$135
- Oil pan (MD199562) ~$105
- Rear crank seal & case (CAPS identifies as "Case Assy, Crankshaft Rr Oil Seal")(MD178606) ~$35
- Timing belt lower cover (MD192109)
- Stay, T/M Housing Front Lower Cover (in front, from engine to bellhousing, because newer oil pan is wider) (MD176109) ~$34
2. Parts that must be modified or replaced
Go here to see pictures of following
- Bracket, A/C Compressor Tension Pulley (required for engines produced before January 1992) (MB958144) ~$40
The Oil pump housing is different so one leg of this bracket is about an inch too long. I measured the
difference and cut it with a dremmel tool leaving a little extra material. Then I used a grinder to slowly
grind the leg down until it was exactly the right length. It is the right length when it will fit flatly on
all three mounting surfaces.
- Backplate on transmission
- Lower timing trasmission plat? Notch with dremmel
- Timing belt drive pulley. When you install the drive pulley and set the engine to TDC you will discover
the mark on the pulley is one tooth off from the mark on the new oil pump housing. A dial indicator verified
that it is exactly one tooth off. I took a drill and made a small mark on the tooth that lines up with the
mark on the oil pump. Don’t buy the 4-bolt main timing belt drive pulley, it lines up great but it doesn’t
have a back flange to guide the timing belt. You have to also buy the crank 4-bolt crank position sensor to
make it work, and that adds up to almost $70, not worth the money.
3. Optional items but strongly recommended
(Be sure to verify part numbers with your dealer)
- Timing belt (MD193874) ~$115
- Timing belt tensioner (MD319040) ~$65
- Timing belt tensioner pulley (MD140071) ~$25
- Timing belt idler pulley (MD319022) ~$25
- Water pump kit (MD972005) ~$85
- Thermostat kit (MD174234) ~$20
- Power steering belt (MD172376) ~$15
- A/C belt (MB879764) ~$25
- Oil feed tube - rear turbo (MD174793, same for all years) ~$15
- Oil feed tube - front turbo (MD161898, same for all years) ~$10
- Rear (left) turbo oil return tube (MD196722)
- Oil return tube - front turbo (MD160039, same for all years)
- Cylinder head bolts, 12x102mm (MD065959) ~$60, qty of 16
- Crank pulley bolt (MD151793) ~$7
- Crank pulley bolt washer (MD096930) ~$2
- Camshaft end plugs, I reused mine but had to use soem silicon to seal them (qty 3) MD150785
- Fuel injector seals, These are heavy duty orings in lower intake plenum that the fuel injectors seal against.
- Fuel pressure regulator o-ring, This is the o-ring on the end of fuel rails that seals to fuel pressure regulator.
4. Things you should consider doing while you are doing the conversion :
You are probably not going to get this deep into the engine for a long time so consider doing the following now:
- Polish intake Manifold. See my polishing section.
- Add a Manifold pressure port to intake manifold. Adding dedicated port gives you a clean source of a
boost signal for your after-market boost gage and boost controller. If you don’t have a need for it at
this time you can add a pipe plug until it is needed. - Gut your pre-cats. Please note this is illegal in all 50 states and on California emission cars you
will get a check engine light because the extra oxygen sensors can tell the pre-cats are not working.
But the pre-cats are only used to meet emissions until the main catalytic converter warms up so if you drive
you car hard enough to warm up the main cat you will meet emissions, hopefully...
The pre-cats are easy to modify when they are off the engine but the rear one is very difficult to remove
with the engine in the car. - Install a after-market downpipe. You have to take the stock one off so why not upgrade.
- Clean your fuel injectors. Marren Fuel Injection or RC Fuel Injections will clean and balance your fuel
injectors for $23-$25 each. Another cheaper option is Cruzin Performance Which will clean and flow test
your injectors for $11 Each! They charge $5.50 and injector extra to make balanced sets.
I have not used them personally. This seems expensive but if one of your injectors is dirty it could lean out a
cylinder and blow a piston. If you are going to upgrade your injectors and fuel controller I would
personally suggest doing it later. You never want to make too many changes at once on an engine that
require tuning. When you are breaking your engine is not the time to be messing with your fuel mixture.
- Install a EGT temperature gauge, it is horrible to install with engine still in car.
If you can not afford a gage, have a 1/8 NPT bung welded to the exhaust manifolds and plug them for now. - Get a valve job on your heads. It will be a major pain if you get the engine together and have low
compression because a valve is not seating. Ask for a 3 angle valve job if the shop does not suggest it
go someplace else because they have old equipment.
- Replace your oxygen sensors. I took one of mine out to get clearance to a bolt and it fell apart!
Now I know why my exhaust smelled like rotten eggs in the morning.
- Replace your clutch, If you want a aluminum flywheel now is the time to install it.
I decided to use the stock flywheel because it was cheaper. Replace your through-out bearing. If you are
replacing your clutch you should replace this too.
- Replace your tie rod ends. You probably will mess them up when you remove
the them from the spindles.
- Clean and polish your engine compartment. Even if you are not going to detail your engine cleaning this
will help prevent corrosions. And save weight. I must have cleaned off 5 pounds of tar and mud from mine. - Add new spark plugs and wires.
- Change your Fuel Filter, its a pain to get to normally.
- Install new vacuumn lines, the wastgate vaccum/boost lines are very difficult to install with engine in the car.